Tuesday, January 12, 2010

autoload ... no, really!

In my experience, about 2/3 of the time, the "autoload" feature of Maya plugins just doesn't seem to work. I load my plugin, check the box for autoload, save and close out Maya normally, re-open Maya, and ... the plugin is not loaded. Grrrr... I would look into it more deeply, except that it's easy to force a plugin to be loaded in each Maya session using userSetup.mel.

First, locate your userSetup.mel file. If it exists, it is located by default in the following directories:

[Windows] Documents and Settings\USERNAME\My Documents\maya\scripts\userSetup.mel
[Mac OS X] USERNAME/Library/Preferences/Alias/maya/scripts/userSetup.mel
[Linux] ~/maya/scripts
/userSetup.mel

If it doesn't exist you can either create it in the appropriate directory above or anywhere in your MAYA_SCRIPTS_PATH. Finally, in the userSetup.mel file, add the following line:

if(!`pluginInfo -q -l -n "PLUGIN_NAME"`) loadPlugin "PLUGIN_NAME";

Mental ray is notorious for not autoloading. Use the following line in userSetup.mel and mental ray and Maya will never forget to load mental ray ever again:

if(!`pluginInfo -q -l -n "Mayatomr"`) loadPlugin "Mayatomr";

You can also use this to autoload mel scripts as well. For example, assuming you have pelting tools installed in your scripts path, add the following line:

source "scripts/peltingToolsSetup.mel"

Monday, January 11, 2010

Texture from shader

Credit for this idea goes to Alfred, who posted the following at blenderartists.org: http://blenderartists.org/forum/showthread.php?t=174790

Have you ever created an awesome shader in one program and tried to replicate it in another? Here's a cheap, easy method to quickly get the look of a shader in one software package into another, with cheap rendering times to boot. All you need, in your target software package, is a method to import an image as a texture, and the ability to use that texture as a spherical environment mapping. Alfred discusses how to do it in Blender -- here's how to do it in Maya. First, find a shader ball representation of the shader you like (if there are reflective or surface texture details, try to get as high res an image as possible). Pixologic offers many shader ball renders you can try out at its MatCap library: http://www.pixologic.com/zbrush/downloadcenter/library/

First find a shader ball you like, and take a screenshot of it. Crop the image so that the sides of the sphere just touch the edges of the sphere, and try to make sure the background color is similar to the color of the edge of the sphere. When cropping, err on the side of cropping too much rather than too little in order to avoid an edge on your shader ball image. In other words, it is better to cut off a little of the sphere on the top, bottom, and sides than to leave a border around the sphere.


Next, in Maya, go to the Hypershade and under the Env Textures, create an Env Ball node. In the envBall's attributes, map the Image attribute by clicking the checkerboard icon, and map it to a file texture (file1.outColor -> envBall1.image). Load the cropped image into the file texture. Finally, pipe the output of the envBall into the color channel of a Surface Shader (envBall1.outColor -> surfaceShader1.outColor). Your final Hypershade tree should look something like this.


For far away renders that don't require a lot of detail, this technique works pretty well with very little overhead for set up and render time.


Of course, you may need to have reflections and refractions in addition to what is provided by the environment sphere image. This is relatively easy to do. Create a blinn shader, and pipe the environment ball output into the blinn's color attribute (envBall1.outColor -> blinn1.color). Try to match the blinn's transparency and specular colors to the colors in the texture image. If the reflections in the image are fuzzy, make the specular highlight larger. If the glass texture is very dark, use more transparency, and if the texture is lighter in color, use less transparency. You will also need to increase the ambient color to account for the double shading (once from the texture image, and once from Maya's blinn). For this image I have a pale dark green transparecy at about 15% brightness. If using Maya software be sure to turn on raytracing. Pretty good for nearly no render overhead, and this technique can be used for any shader ball image you come across.

Monday, January 4, 2010

Tweaking Maya Paint Effects Lightning

Maya paint effects provides a fantastic, easy way of creating decent-looking electricity effects in a 3D environment. One of paint effects' greatest advantages as that they render extremely quickly as a post process. However, this render time advantage severely limits the paint effects' capabilities. Luckily, Maya provides tools to get around many of these limitations.

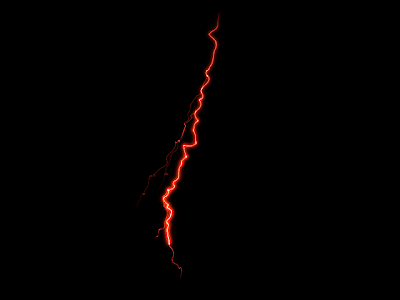
In the Rendering Menu, do Paint effects -> Paint Effects Tool, then Paint effects -> Get Brush... In the electrical folder, choose lightningOrange.mel. Now in the viewport, draw a small curve, and a stroke of lightning will appear. Render this in Maya Software, and you get a nice stroke of lightning. Play your time line, and you'll see it's already set up for electrical animation.


Some limitations are immediately obvious: you can't render in Mental Ray, you can't deform the lightning in any way, and, probably worst of all, you can't easily control the opposite side of the paint effect that is not attached to the curve. This is irritating because, by default, the "source" end of the lightning is at this opposite side.

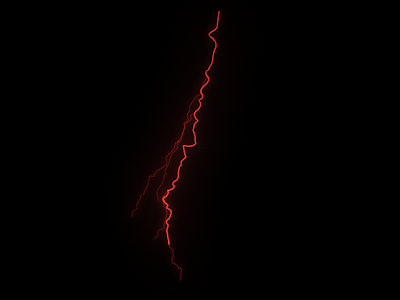
The first step to a more interactive lightning effect is converting to geometry. Select the paint effect stroke, and do Modify -> Convert -> Paint Effects to NURBS. Render again, and it will look slightly different, but at least you can now render in mental ray (Be sure to set the anti-alias settings high enough or you will get breaks in the thin geometry -- easiest way is to just use the Production quality preset). You can try to approximate the look of the original lightning bolt by tweaking the Shader Glow attributes (more on that later).


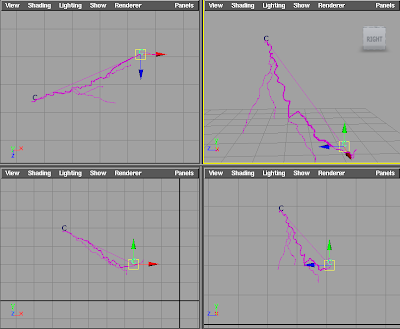
As geometry, you can do now manipulate it with deformers. A quick, dirty way of creating source and end "locators" is to use a control curve. Do Create -> EP Curve Tool options, and in the options select a Linear curve degree. Now place two points for the curve, and move the control points to the two ends of the lightning. Under the Animation menu, do Create Deformers -> Wire Tool. In the outliner, select the strokeShapeLightningOrange1Surfaces group node (the surfaces to deform), and press enter. Then select the curve1 curve (the wire deformer), and press enter. Now you have a curve whose 2 ends can be used to place your electricity effect.

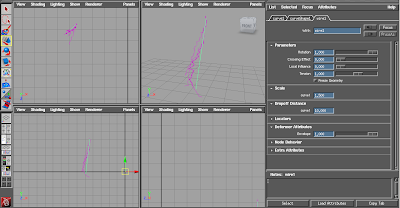
There might be some issues with the deformer, depending on your default setup. Select your curve1, and in the Attribute editor select the wire1 tab to get attributes for the wire1 deformer. Increase the Dropoff Distance if any part of the lightning is "sticking" to its original position. Increase the Scale to increase the size of the lightning geometry and reduce the stretching effect. Push play in the timeline -- it's still animates fine!


Now it's kind of irritating to have to get into component mode every time you want to move the lightning, so use Clusters to transform the curve CVs individually. Select one of the curve's CVs and do Create Deformers -> Cluster. Repeat for the second CV. Now you have two clusters to move the curve points of the lightning.


Finally, let's fix the look of the lighting. In the hypershade, select the Shader Glow node, and look at its attributes in the Attribute Editor. The first thing you should do immediately is turn off Auto Exposure. Under Glow attributes, set Glow intensity to 0.5, and Glow spread to 0.035. Under Halo attributes, set Halo intensity to 1.0 and Halo spread to 0.1. Use these as a starting point for your own tweaks. You can change the color of the lightning mainly by changing the color of the Incandescence on the lightningOrange1Shader node.